
Khao mor din ข้าวอบหม้อดิน, or clay pot rice, is a comfort classic across many Asian countries and it's a frequent meal in my own kitchen. With the right tools and a little bit of patience, it's easy to learn how to make evenly cooked vegan clay pot rice that retains the crispy bottom that makes this method of cooking rice so special.
Learn how to make clay pot rice at home

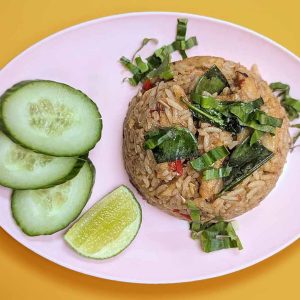
This post is designed as a general guide for how to make a good rice base, regardless of toppings, but I've also included a simple recipe for clay pot rice with tofu and holy basil (khao op kaprow ข้าวอบกะเพรา) if you're at a loss for ideas.
Jump to:

Preparation and requirements for clay pot rice
While there are other methods for achieving the crispy toasted rice crust that sets clay pot rice apart from other methods of cooking this grain, we're focussing on using a clay pot here. You can usually find them in larger Chinese grocers if you don't already have one.
For reference, the clay pot I use for this recipe is a smaller 16 centimetre pot with a handle (I use a small single serving pot because I'm the only one in the house who likes rice). The material, a blend of clay and sand, has a rough external texture. The inside is glazed.
Soaking the rice first is important. Unsoaked rice can turn mushy on the outside while staying undercooked on the inside, so soaking results in a better texture. Soaking allows the rice to absorb water upfront, thus reducing the cooking time while also ensuring more evenly cooked grains.
This recipe requires a gas stove or hob. If you've got a camping stove, that's also fine.
Seasoning your clay pot before first use
Explanations about how and why to season clay pots abound on these here interwebs. The most consistent step across everything I've read is to submerge the clay pot in water and give it a long soak. I usually leave it overnight.
Following the soak, discussions move onto sealing the clay pot in order to create a protective layer to increase stability. Some call for oiling and heating the pot, others for making rice porridge (or simmering some sort of starch with water) to fill the tiny pores in the pot that aren't visible to the human eye. This makes some sense to me with regards to unglazed clay pots, but what about those which are glazed? Every Chinese clay pot I've seen for sale in the past couple of decades I've been shopping in East Asian shops is either wholly or partially glazed. Is the sealing necessary when there's already an impermeable glaze? My suspicion is people carried over the traditional practice of sealing unglazed pots, which do need seasoning, but I don't know.
As for what I do: rub some neutral oil over all of the unglazed parts of the clay pot and cook it over low heat for 10 or 15 minutes. I don't know if this does anything. All I know is my clay pots always stay intact until I eventually drop them.
Aside from dropping, rapid temperature changes are the other great risk factor in breaking a clay pot. Always allow the clay pot to cool naturally to room temperature before you attempt to wash it.
Instructions
Any long time readers of this blog know I detest when people go on with endless photos of the same thing while forcing readers to choke on ceaseless clouds of empty text, but I guess it might be helpful to some of you to see some terrible quality photos of the process.

Add rice and water or stock and simmer until the rice has absorbed most of the liquid.

When the liquid is mostly cooked down, top the rice with whatever you want to top it with.

Pop the lid on and cook for ten minutes on very low and then drizzle oil around the edges without opening the lid.

Cook for another ten minutes, constantly rotating your clay pot at angles every 30-60 seconds.

Tada, it's done!

and we have a nice crispy rice crust
Clay pot rice topping ideas

I usually don't think too far ahead about what I'll top clay pot rice with. Rather, I look in my fridge and cupboards, see what I've got to hand and what needs using up, and go from there. Here's a generalised list of items I think work well as vegan clay pot rice toppings:
- vegan cured Chinese sausage (lap cheong) and shiitake mushroom
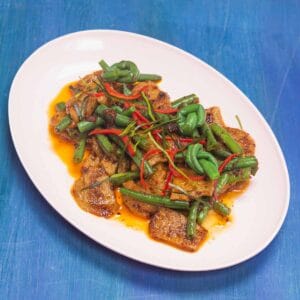
- "dry" curries like kua kling or pad prik king (you can use other curries too, but leave the bulk of the liquid behind)
- Seasoned aubergine and mince (great with some Thai basil as a garnish, post cooking)
- Faux meat chunks with black bean sauce
- Any mock meat + sturdy greens like asparagus, bok choy, and gai lan.
- Beeeannnsss
Keep in mind the topping should either be heavily seasoned (in the same way that a curry should be too salty to eat as a soup, but just perfect with rice) or served with a sauce of some description.
Clay pot rice
Equipment
- Clay pot
- Gas hob
Ingredients
- 150 grams jasmine rice
- 180 millilitres stock or water hot
- 2-3 teaspoons oil
- Topping(s) of your choosing e.g. tofu gaprao
Optional tofu pad gaprao topping
- 1 ½ tablespoons vegetable oil
- 4 large cloves garlic, roughly chopped
- 1-3 bird's eye chillies, roughly chopped
- 215 grams firm tofu
- 1 tablespoons light soy sauce
- ½ teaspoons granulated sugar
- ¼ teaspoon table salt
- packed ½ cup holy basil leaves
- chilli vinegar for serving
Instructions
- Rinse the rice two or 3 times. Cover with water and soak for at least an hour. Drain in a sieve, shaking as much excess water from the grains as possible.
- Pop your claypot on the smallest hob you've got and turn the heat to medium-ish. After a minute or three, add the rice and hot stock.
- Bring the temperature up to a simmer and give the rice a stir to loosen any grains that are clinging to the bottom. Cook for a few minutes, somewhere between 3-5, stirring from time to time to liberate any stuck grains, until the rice has expanded a little and the liquid is no longer covering the grains. The lid stays off during this process.
- Turn the heat to the lowest heat and layer your toppings over the rice, then place the lid on. Set a timer for 10 minutes, but don't leave the room. Put your ear close to the claypot and listen to the sound of the rice cooking, and know that when this sound stops and/or if you smell burning, it's time to stop.
- You'll notice the lid doesn't seal perfectly over the clay pot and we're going to use this gap to add oil. Slowly drizzle oil around the lid, close to the edge, all the way around the perimeter. It will drip down into the pot. Try to avoid any temptation to open the lid.
- Set a timer for 10 minutes. Imagine the bottom surface of the clay pot is divided into four quadrants, as if cut into a pie. Tilt the pot so that only one of those quarters is in contact with the flame (still on the lowest heat) and the pot is sitting at an angle. This means you will need to physically hold the pot. Turn every 30-60 seconds, so the flame is hitting the next quarter along. Do this until your timer goes off. Again, if you smell burning then it's time to stop.
- Turn off the heat and leave the pot to sit (leave the lid on!) for about 5 minutes before serving.
For the tofu and holy basil topping (if using)
- Heat the oil in a frying pan or wok. Add garlic and chilli and cook until the garlic begings to turn golden. Crumble the tofu by hand directly into the pan (some variation in size of pieces is fine). Add the soy sauce, sugar, and salt. Continue to fry until the tofu gets a little bit of golden colour on some of the pieces.
- Turn off the heat, add the holy basil leaves, and toss through. Use in step four of how to make clay pot rice, above. Clay pot rice topped with pad gaprao isn't complete without chilli vinegar
Related
Looking for other recipes like this? Try these:



Leave a Reply